

405 gallon build
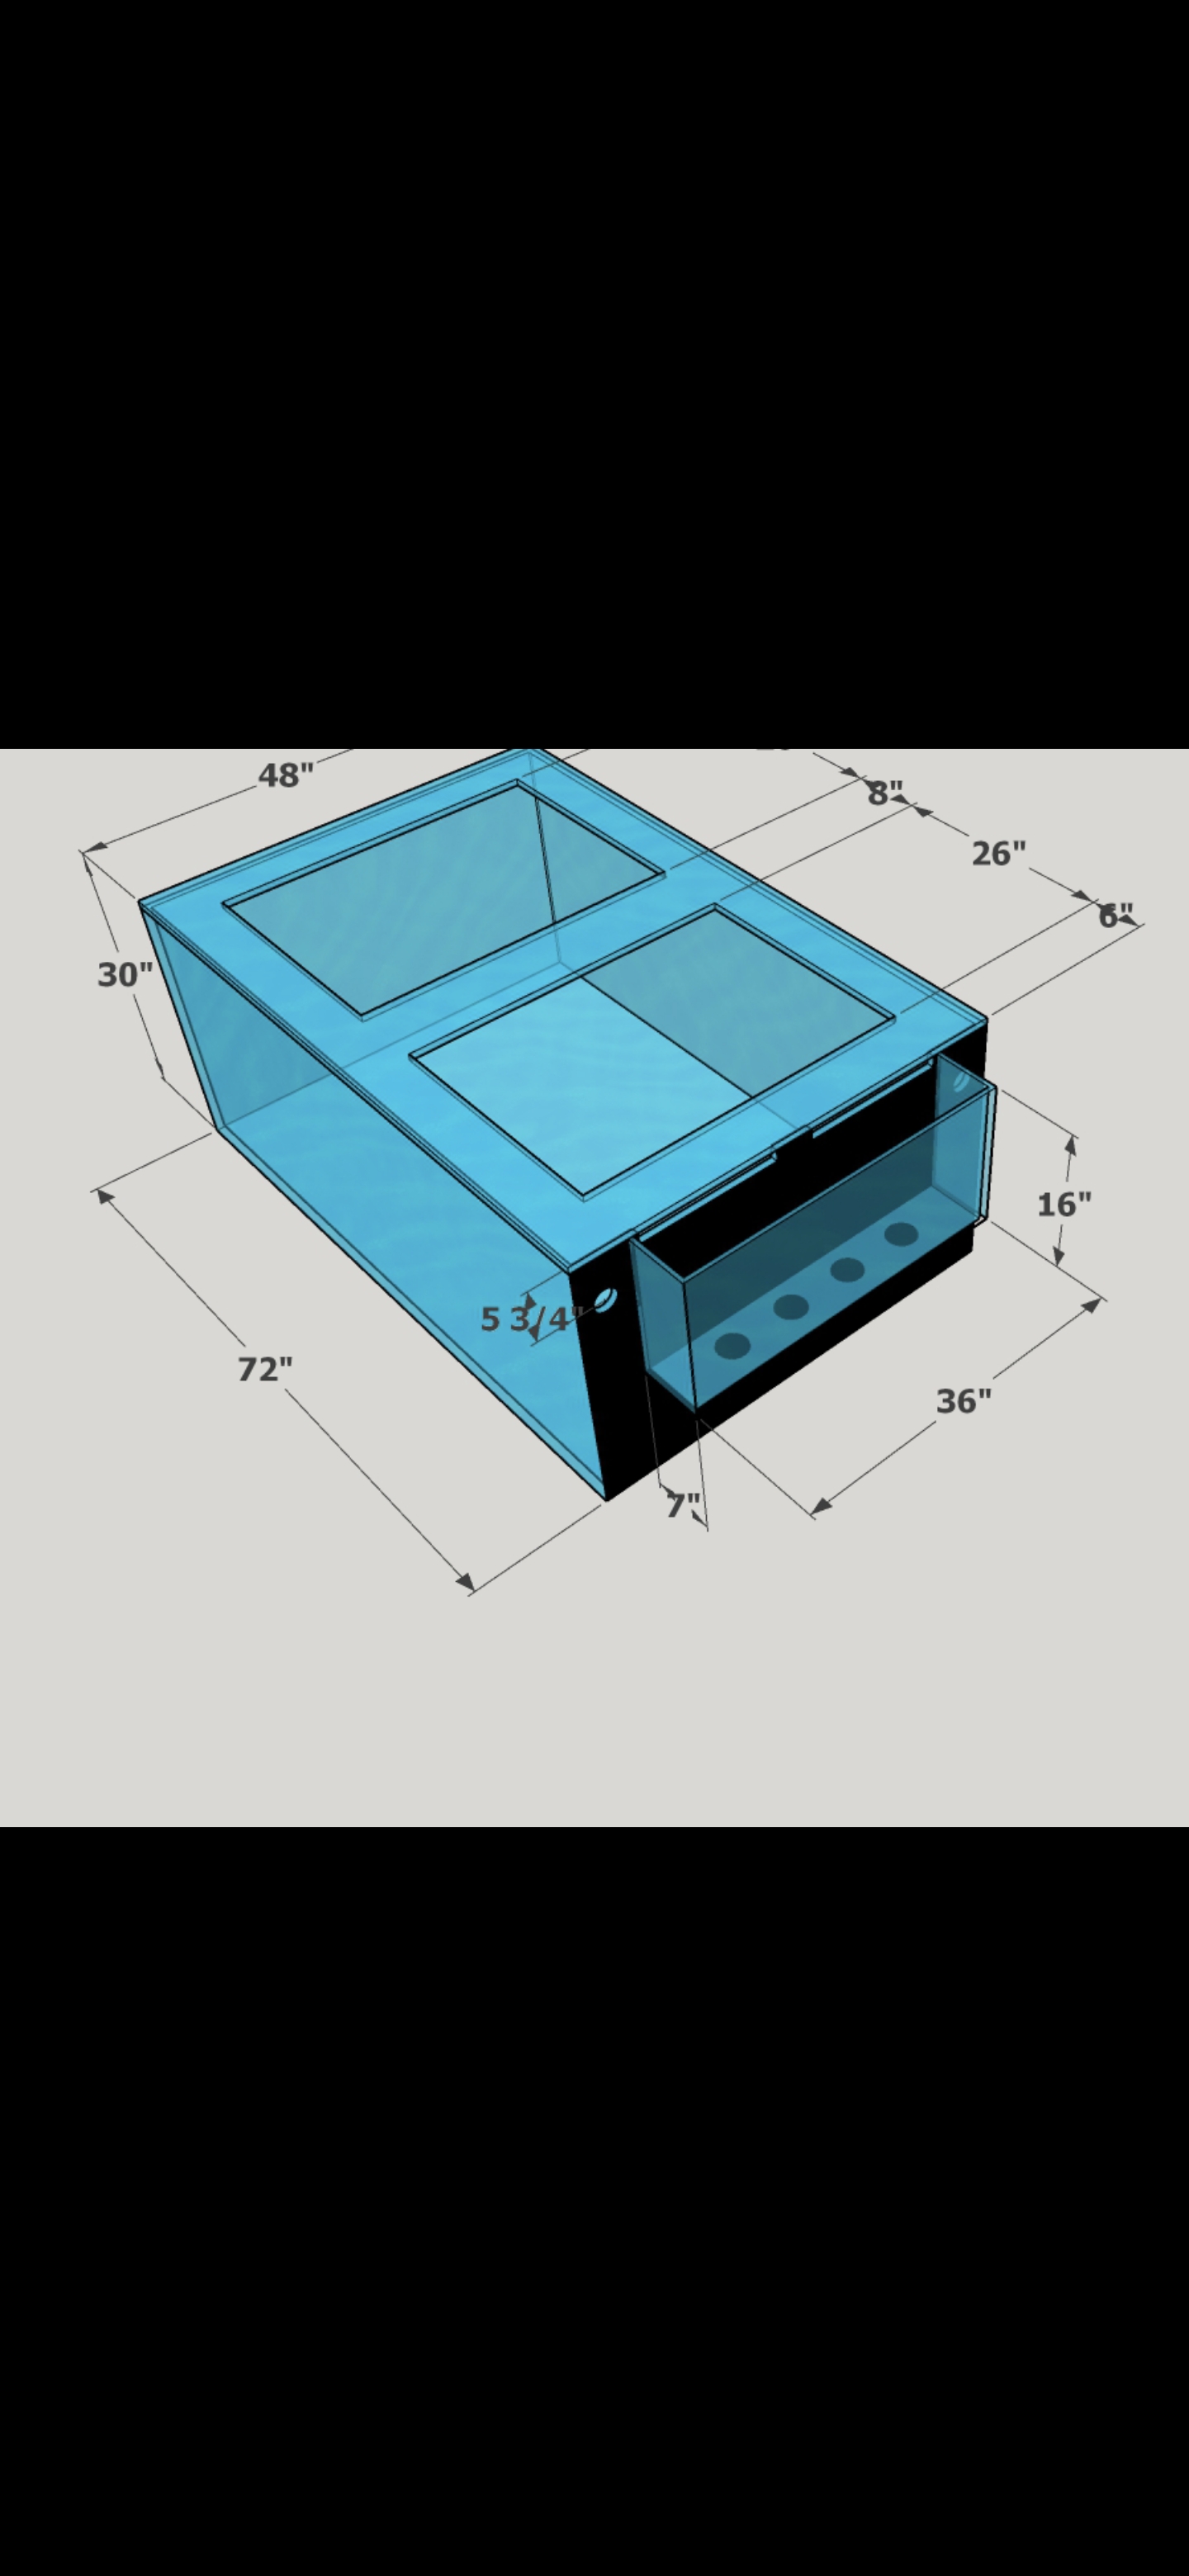
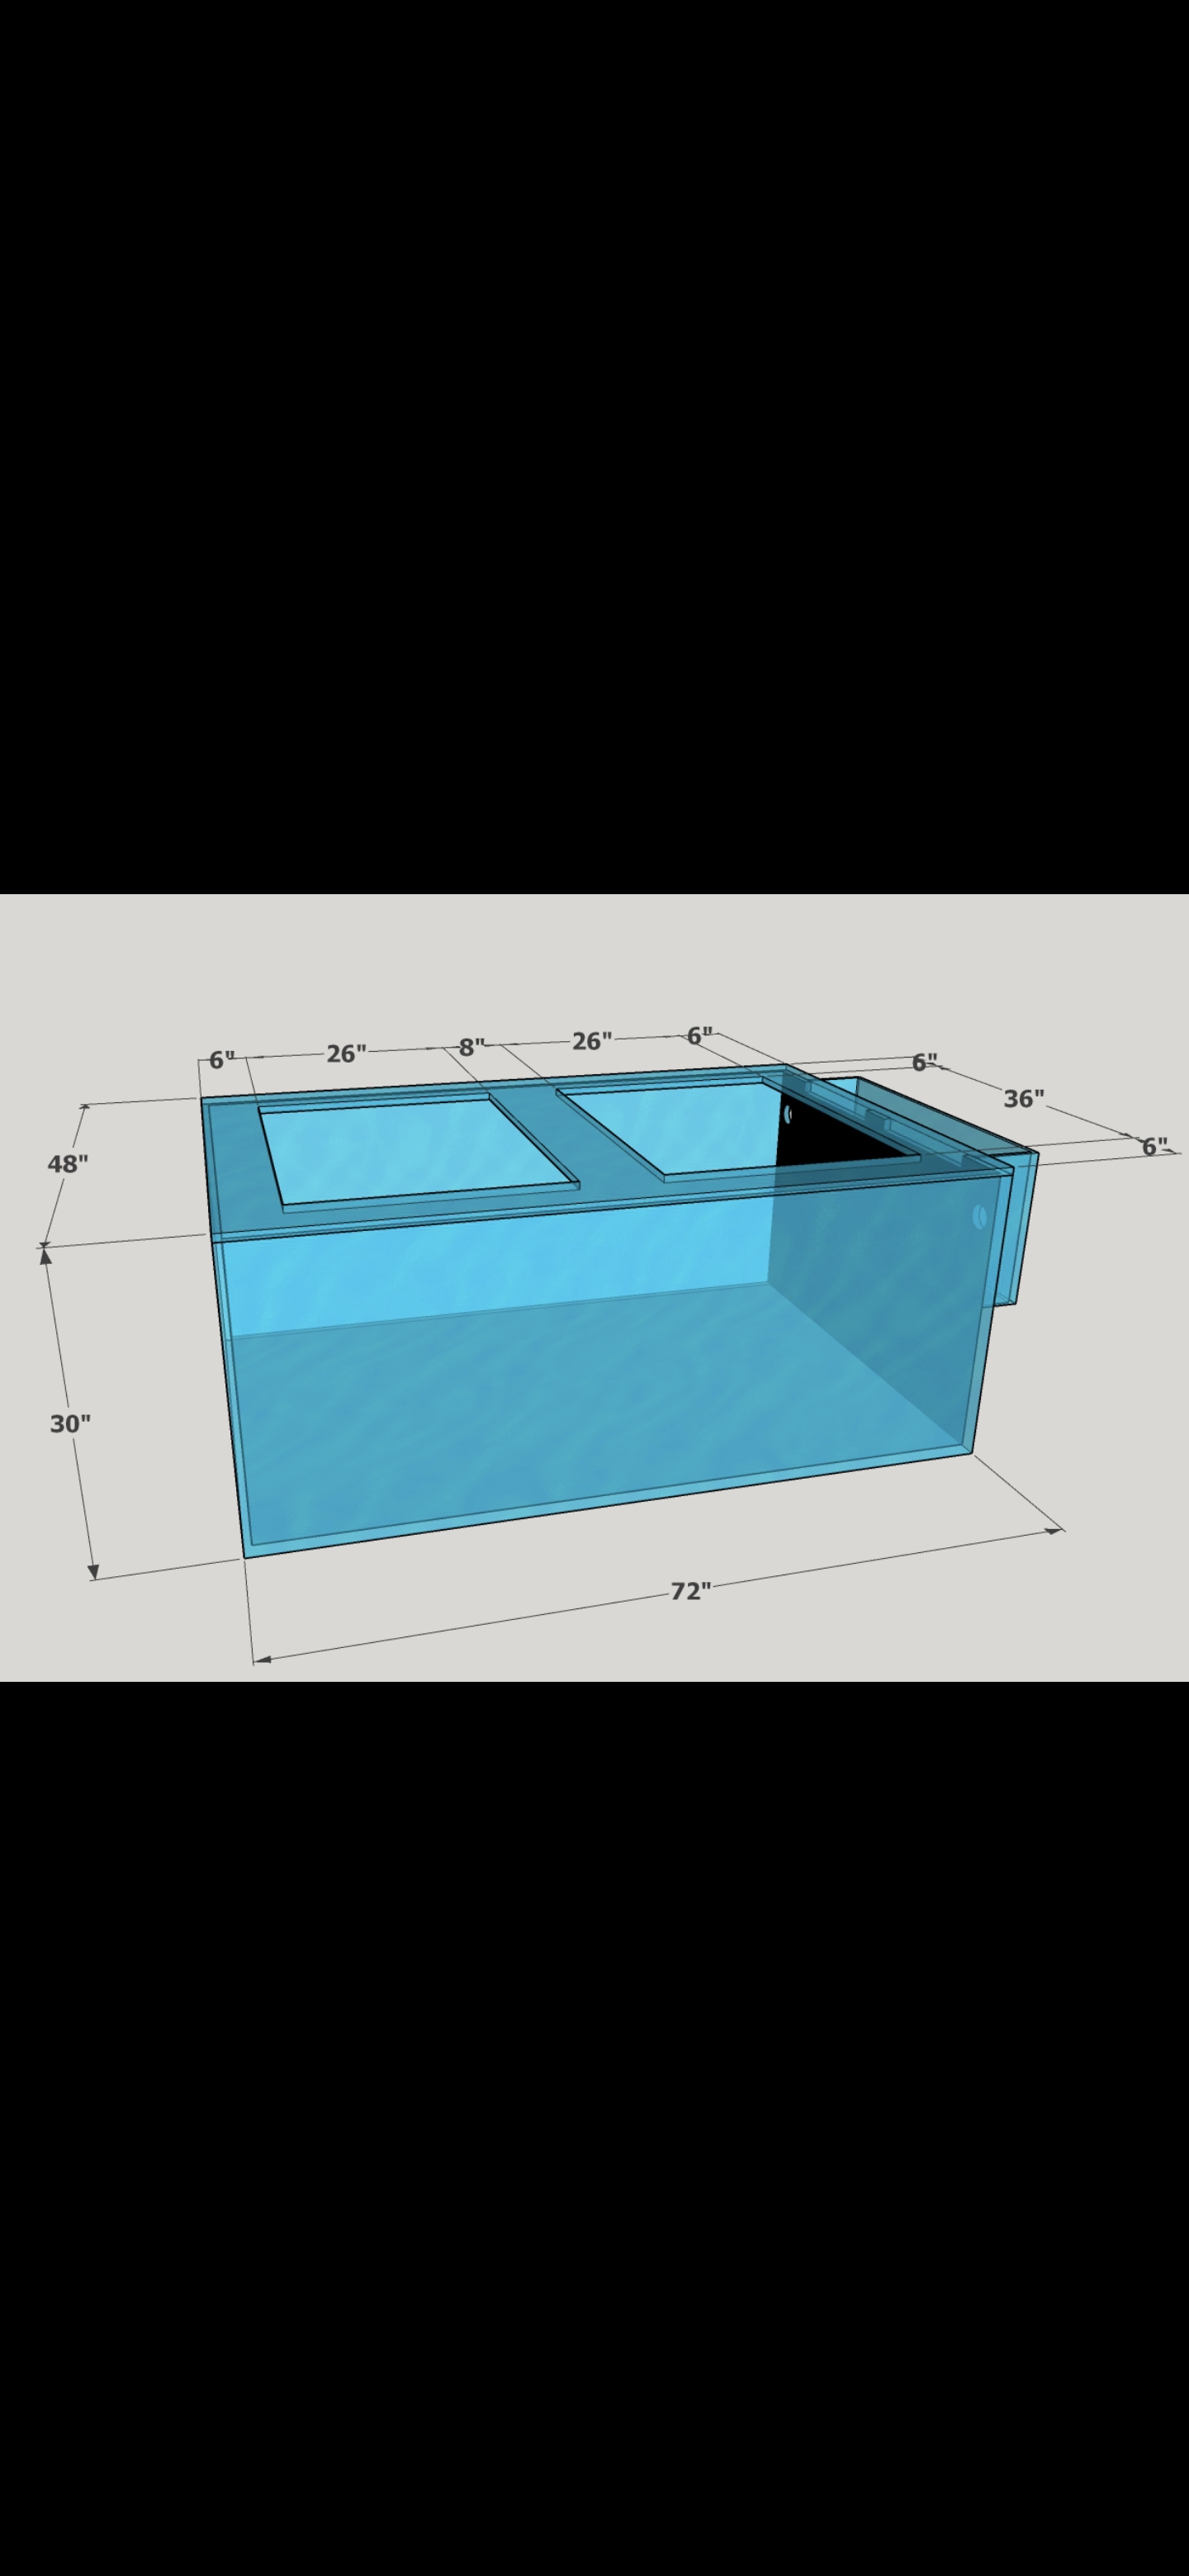
This thread is for my custom 405 gallon cell cast acrylic peninsula display currently being put together. I will add information and updates along with photos and video as the build progresses. The tank, stand and canopy are being manufactured by Tsunami Aquariums to my build specifications.
Architecture/ furniture design:
The tank is 3/4" cell cast acrylic and will be placed on a custom 2" square aluminum pipe frame wrapped in custom white oak millwork stained with provicial 211 and marine varnished with a frost white corian top with bullnose edges. The tank will sit inside the bullnose corian frame to hide the lower panel of acrylic and part of the sand bed depth for a clean look.
The stand has 5 sets of double doors with polished brass fixtures for 360° access to everything in the sump area and all plumbing. This peninsula will sit off of a tiled backsplash accent wall leaving a 20 inch access/service corridor for plumbing, wire bundles and a
Automatic Top Off reservoir.
This corridor will be hidden by two 20" wide panels made from marine varnished white oak stained and milled to match the stand and canopy. These access pannels that will stand the same height as the complete display will attach magnetically for a clean look and easy tool free access.
The canopy is a custom design, open top for ventilation with both long sides opening gull wing style completely for total access. The canopy is 15 inches tall with a 2 inch overlap on the tank to hide the top panel/euro bracing and water line. I have designed two brackets for the open wall side of the canopy to handle two industrial IP67 140mm Noctua fans for air flow and cooling of the light array. The access corridor is not only for plumbing and electrical access, but also works as a Chimney for air exchange to help dissipate heat and humidity. I have a commercial ac system that returns cold air right into this space and surrounding area.
For safety I had 3 separate dedicated circuits installed and set up with ARC/GFCI breakers for fire/shock protection. This keeps me and my family and home safe while offering redundant protection should one circuit trip. More on redundancy planning below.
The lighting system:
-SIX Kessil A360XE lights on Biotek Marine articulating mounts with optional 55° lenses ready for service.
-THREE ReefBrite Supra dual 80w T5 fixtures using ATI Coral Plus and Giesseman Super Actinic bulbs 50/50
The kessils will be set in two rows of 3 angled inward towards the scape like stadium lighting.
The Supra Dual 80w T5 fixtures will flank both rows of Kessils with one fixture between them ensuring complete coverage of this 24 sq ft space. The kessils will be controlled with the wifi dongle and the Supras will be plugged into my HYDROS control system.
The Hydros network:
-One HYDROS X-10 controller
-Two HYDROS XP8 controllers
-One HYDROS IV Pro
-Two Hydros XS controllers
-One HYDROS Kraken with Weize 100Ah LifePo4 backup battery using Victron Smart Charger with dedicated breaker giving me up to 48hrs of battery backup for vital life support.
-One HYDROS Wave Engine for wavemaker control
- Point source leak detector, rope leak sensor, cabinet switch sensors, salinity kit, temp probe, Milwaukee ph probe, optical water level sensors and protein skimmer level sensor.
-Dedicated tablet for HYDROS system and reef equipment
-Three 1.5" HYDROS flow sensors (manifold, both returns)
-One 2" HYDROS flow sensor for UV manifold
To ensure HYDROS has a stable connection I installed and set up a 2.4Ghz TP Link network dedicated to the reef. This access point ensures stable connectivity to the cloud and easy uninterrupted tablet access to the system while my family utilizes our home gateway for gaming, streaming and general use.
Filtration Equipment Plumbing and pumps:
-2 dedicated external Reef Octopus Varios 10 return pumps plumbed to display using 1.5" red pvc and Grey sch 80 fittings feeding to two independent 1.5" bulkheads on the wall side utilizing two 1.5" VCA Random Flow Generators. Each return will use a reverse 1.5" clear union check valve need from the line and placed above the tank to create a syphon break to prevent excessive water drainage during power outtages or maintenance.
(Using 1.5" line off the 1.25" return output on these pumps negates line friction reducing head pressure allowing my pumps to push more volume with less effort reducing heat and power consumption prolonging pump life and giving me better flow.)
One Varios 10 return will have a 2" manifold tee off the main line and back into it for a 57w Aqua UV UV sterilizer which has a 2" body and attachments. This manifold will utilize a 2" HYDROS flow sensor with a 1.5" Spears union Gate Valve on the main 1.5" line for flow control through the UV Unit allowing me to target specific organisms. The 2" manifold utilizes two 2" union ball valves to allow complete isolation for maintenance.
-54x30x20" Custom Acrylic Tsunami Sump
-One external Varios 6 dedicated Sump Manifold pump feeding a 1.5" line with three 1/2" Spears Union Gate Valves to feed a calcium reactor and other equipment if needed. I plan to keep one 1/2 line open for water changes as this just makes my life easier.
-Two RedSea ReefMat 1200 fleece rollers hard plumbed using unions for maintenance access to two dedicated syphon lines utilizing 1.5" Spears Gate Valves for flow tuning.
-One Reef Octopus Regal 300 Int Protein skimmer with Co2 Scrubber
-Drainage is a four pipe system, all 1.5" red PVC with Grey Sch 80 fittings and Hayward bulkheads.
-Two 1.5" dedicated Gate valve controlled syphons.
-One 1.5" Durso backup open channel drain
-One 1.5" Emergency drain
This gives me complete redundancy with drainage should I need to shut down a line using a union ball valve to maintain it. Every line has the ability to be closed and disconnected with unions for easy tool free access.
All three sump pumps will be external feeding from 1.5" bulkheads in the final chamber following a bubble trap. Each will have a 1.5" union ball valve between them and the sump so the line can be shut down completely from both sides and the pumps can be removed for maintenance tool free.
The pumps are on the wall side of the peninsula and the drains will carry water to the short viewing side furthest from the wall where the fleece rollers will be located. The UV sterilizer will be mounted vertically in the 20" corridor for easy access to clean and change bulbs and to avoid air trapping in the unit as this can crack the quartz sleeve inside.
For water access I am using a Frizzlife PD1000 with a BRS dual chamber DI filter utilizing Pro Anion and Mixed Bed Resin. I am able to get 1,000gpd from this unit for my needs with a 2nd unit available in an emergency should I need a lot fast. The RO/DI system is set up under a Corian counter and sink right next to the side of my tank to make life easier for me. I have a pull down faucet for cleaning with a large sink basin to handle equipment like my 12" skimmer cup.
On the other side of this display tank is a 9ft lit corian lab counter with matching oak cabinetry for my diagnostic laboratory. Here there are two microscopes, a Tomlov DM602 Pro 2000x magnification scope with 10" display screen and a Woehrsh 5000x compound microscope with high resolution digital camera for recording and viewing with multiple people at once. A Vortex mixer and magnetic mixer along with 2 precision digital scales and my Borosilicate glass set also reside here. I also have a UV sterilizer cabinet and Steam Sterilizer cabinet for equipment such as scalpels and bone cutters with a sharps bin for disposal. A band saw and Dremel saw kit are also housed here for fragging.
Dyes, cell counting pools and general lab equipment stored in the cabinets and drawers along with replacement filter media and other tools. The lab runs on its own dedicated protected circuit as well.
The rest of this room is a library/lounge to make this a comfortable and enjoyable space with seating for 8 and generous space to move around the tank.
Temperature in this space is remarkably stable with 18" thick reinforced concrete outer and load bearing walls framed to 24" thick and well insulated. The room is on the north side of a 3 story buildings first floor and never sees direct sun. Add to this a robust commercial grade central air and heating system and this place never strays beyond 2°F in any direction. For humidity I have a 70pt per day dehumidifier linked directly to the sink drain so no buckets or emptying required. I still maintain a 3 point observation mesh around the room for temp and humidity to ensure things are working properly.
More to come! The tank and stand are in production as I type this out.
Embedded tank snapshot · read-only
The Masters Touch 405 Gallon Reef Display
Setup
Nothing extra logged for setup, or the owner leaves these blank on purpose.
Latest test kit readings
Structured kit readings only, no prose notes appear on shared pages.
No structured readings on the latest logged test.
Recent water change dates
Dates only, individual water change notes are private.
Livestock
Labels only, species notes aren't exposed on shared links.
♥ 0